How to Choose the Right Fertilizer Spreader for Your Lawn (And Why It Matters)
Applying fertilizer correctly is one of the most important steps in growing a healthy, consistent cool-season lawn. Even the best fertilizer will fail if applied unevenly. That’s why choosing the right spreader — and understanding how to use it — dramatically impacts color, density, and overall turf performance.
This guide breaks down the different types of spreaders, how to avoid streaks and striping, what features matter, and how to apply fertilizer like a pro.
🌿 Why Your Fertilizer Spreader Matters
Cool-season grasses respond very noticeably to uneven nutrient distribution. If fertilizer is applied too heavily in one section and too lightly in another, you’ll see:
Light and dark striping
Patchy or thin turf
Excess stress during summer
Weak spring recovery
Over-application “burns” in streaks
A good spreader provides:
Even coverage
Consistent nutrient delivery
Precise control around edges
Fewer mistakes
Faster, cleaner applications
Your spreader is not just a tool — it’s a measuring device that determines how your lawn actually receives the fertilizer you purchase.
🌱 Types of Fertilizer Spreaders
Different lawns benefit from different spreader styles. Here’s what you need to know:
1. Broadcast (Rotary) Spreaders
These spreaders throw fertilizer in a wide arc, often 5–12 feet depending on product and model.
Pros:
Fast coverage
Smooth, blended distribution
Best for medium–large lawns
Cons:
Harder to control around sidewalks, driveways, or flower beds
2. Drop Spreaders
Drop spreaders release fertilizer directly beneath the hopper for maximum precision.
Pros:
Very accurate
Ideal for tight landscapes or edges
Cons:
Slow
Easy to miss strips if not lined up perfectly
Not ideal for large lawns
3. Chest-Mounted Spreaders
These spreaders are worn across the chest and offer excellent control in tight or uneven areas.
Pros:
High precision
Excellent around beds, trees, fences, and slopes
Cons:
Can strain shoulders, neck, and back
Not ideal for large properties
🌾 How to Avoid Striping and Overlap Mistakes
Striping (unintentional light/dark bands) is one of the most common mistakes homeowners make. Most striping happens for three reasons:
Not overlapping correctly
Misjudging the spreader’s effective spread width otherwise known as “Swath”
Walking at inconsistent speeds
✔ Overlap by half the spread width
If your broadcast spreader throws fertilizer 10 feet wide, your next pass should be 5 feet over.
Never go edge-to-edge — the edges of the pattern receive less product.
✔ Bigger spreaders have larger “light zones”
With larger-aspect spreaders (common in high-end models), the edges of the spread pattern taper off more noticeably. If you line up passes edge-to-edge, the light zones will create visible striping.
✔ Control your pace
Most spreaders are calibrated for a walking speed around 3 mph (a brisk walk). Slower or faster changes everything.
✔ Test your spread pattern first
Spread a small amount over a tarp or paved area. This shows:
Heavy zone (center)
Medium zone (effective width)
Light zone (don’t rely on it)
This one test saves you countless mistakes.
🧪 Understanding Fertilizer Bag Rates (And How They Match Your Spreader)
Every fertilizer bag includes a recommended application rate, usually listed as:
Pounds per 1,000 sq ft, or
Total square footage covered per bag
Bags often list sample spreader settings for popular models — these are starting points, not perfect formulas.
Use the TOOLS to help calculate needed product.
✔ How to apply bag rates correctly:
Determine your yard’s square footage (use your Tools Page calculator).
Find the bag’s recommended lbs/1,000 sq ft rate.
Use the bag’s spreader setting as a baseline.
Perform a small test run to verify flow rate.
Fertilizer density, humidity, and spreader age all impact how much product is actually applied — so always test first.
🌱 Half-Rate vs Full-Rate Application Methods
There are two reliable ways to apply fertilizer evenly. Each has its own benefits.
Method 1: Half-Rate, Wheel-to-Wheel (Most Accurate)
Divide the fertilizer rate into two equal amounts. Example of 2 lbs per 1000 square feet. Spread at 1 lb per 1,000 square feet.
Pass 1:
Spread the half rate wheel-to-wheel (spreading the product to your last passes tire marks)
You will be overlapping with purpose using this method where the overlapped areas are receiving the full rate.
Pass 2:
If all calculated needed product is not used, make passes perpendicularly from the first pass, utilizing the same wheel to wheel method until all needed product is spread as evenly as possible.
Benefits:
Easiest way to avoid striping
Compensates for walking inconsistencies
Helps ensure perfect coverage
Downsides:
Takes twice as long
Must divide fertilizer accurately
Can have lighter application on edges of lawn where only half rate is being used.
Method 2: Full-Rate, Throw-to-Throw (Faster, More Risk)
Apply the full amount in one direction only, overlapping your passes so each throw reaches the halfway point of your previous throw.
Benefits:
Fastest application method
Ideal for large lawns when done correctly
Risks:
Easy to misjudge overlap → causes striping
More sensitive to changes in walking speed
Poor for beginners
🌱 If You Finish the Lawn and Still Have Fertilizer Left…
This usually means:
Underapplication
Incorrect spreader setting
Inconsistent walking
Product density differences
The solution:
Apply the remaining product by making a full pass perpendicular to your previous direction.
This ensures:
No area is over-fertilized
No product is wasted
You reach the correct total rate
🚩 Mark Your Passes with Flags (Pro Tip)
Turf professionals and golf course crews use marking flags because they help maintain:
Straight walking paths
Correct overlap
Clean edges
Even distribution
Flags placed at the measured swath distance serve as visual anchors and dramatically reduce user error.
Example: If the swath of a product is 12 feet and you are using the Full rate or Throw to Throw method, first pace 6 feet off from the edge of your lawn and place the spreader there. Then from the spreader, you will pace 12 feet and place a flag there. The next pass you will walk directly toward that flag. Repeat the process for width of the lawn. For the Half rate or Wheel to Wheel method, and the swath remains 12 feet. You will do the same process but at half the swath, so instead you will pace every 6 feet to get the full coverage. Remember Wheel to Wheel is twice the passes but less risk with striping/skips.
🔥 Spilled Fertilizer Will Burn Turf — Here’s How to Fix It
Granular fertilizer is salt-based. If a large amount spills in one spot, it will burn the turf and may kill the area completely.
How to fix it properly:
✔ Use a shop vacuum to remove as many granules as possible
✔ Do NOT rake — this pushes product deeper
✔ After vacuuming, flood the area with water to dilute leftover salts
✔ Expect temporary yellowing
Vacuuming dramatically reduces long-term damage.
🌿 What Features Matter in a Fertilizer Spreader?
Side Deflector / EdgeGuard → essential for clean edges
Even spread pattern → biggest factor in turf quality
Rate control → must be easily adjustable
Build quality → prevents clogs and skips
Tire quality (for push spreaders) → smoother passes
Comfort (for chest spreaders) → reduces fatigue
🌱 Recommended Fertilizer Spreaders (Low, Medium, High Options)
🟩 Low-Cost Option (Budget-Friendly)
Scotts Turf Builder EdgeGuard DLX Broadcast Spreader
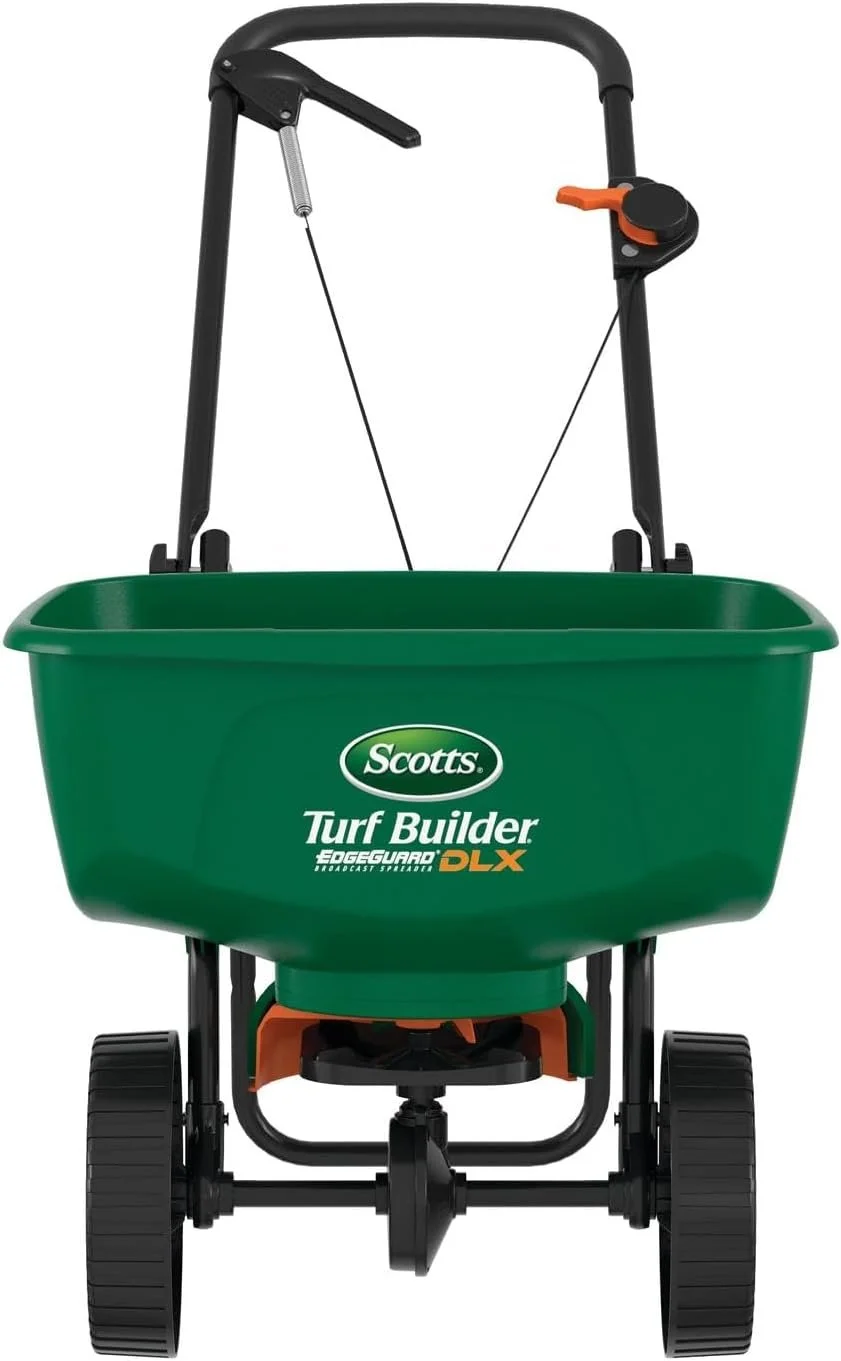
A great entry-level spreader that's dependable, simple to use, and ideal for small to medium lawns. The EdgeGuard technology helps prevent fertilizer from spilling onto sidewalks or landscape beds.
Best For:
Homeowners looking for an affordable, easy-to-use spreader that still delivers even coverage.
👉 View on Amazon:
Scotts Turf Builder EdgeGuard DLX Broadcast Spreader
🟨Medium Option (Best Value)
Solo 421 20-Pound Chest-Mount Spreader
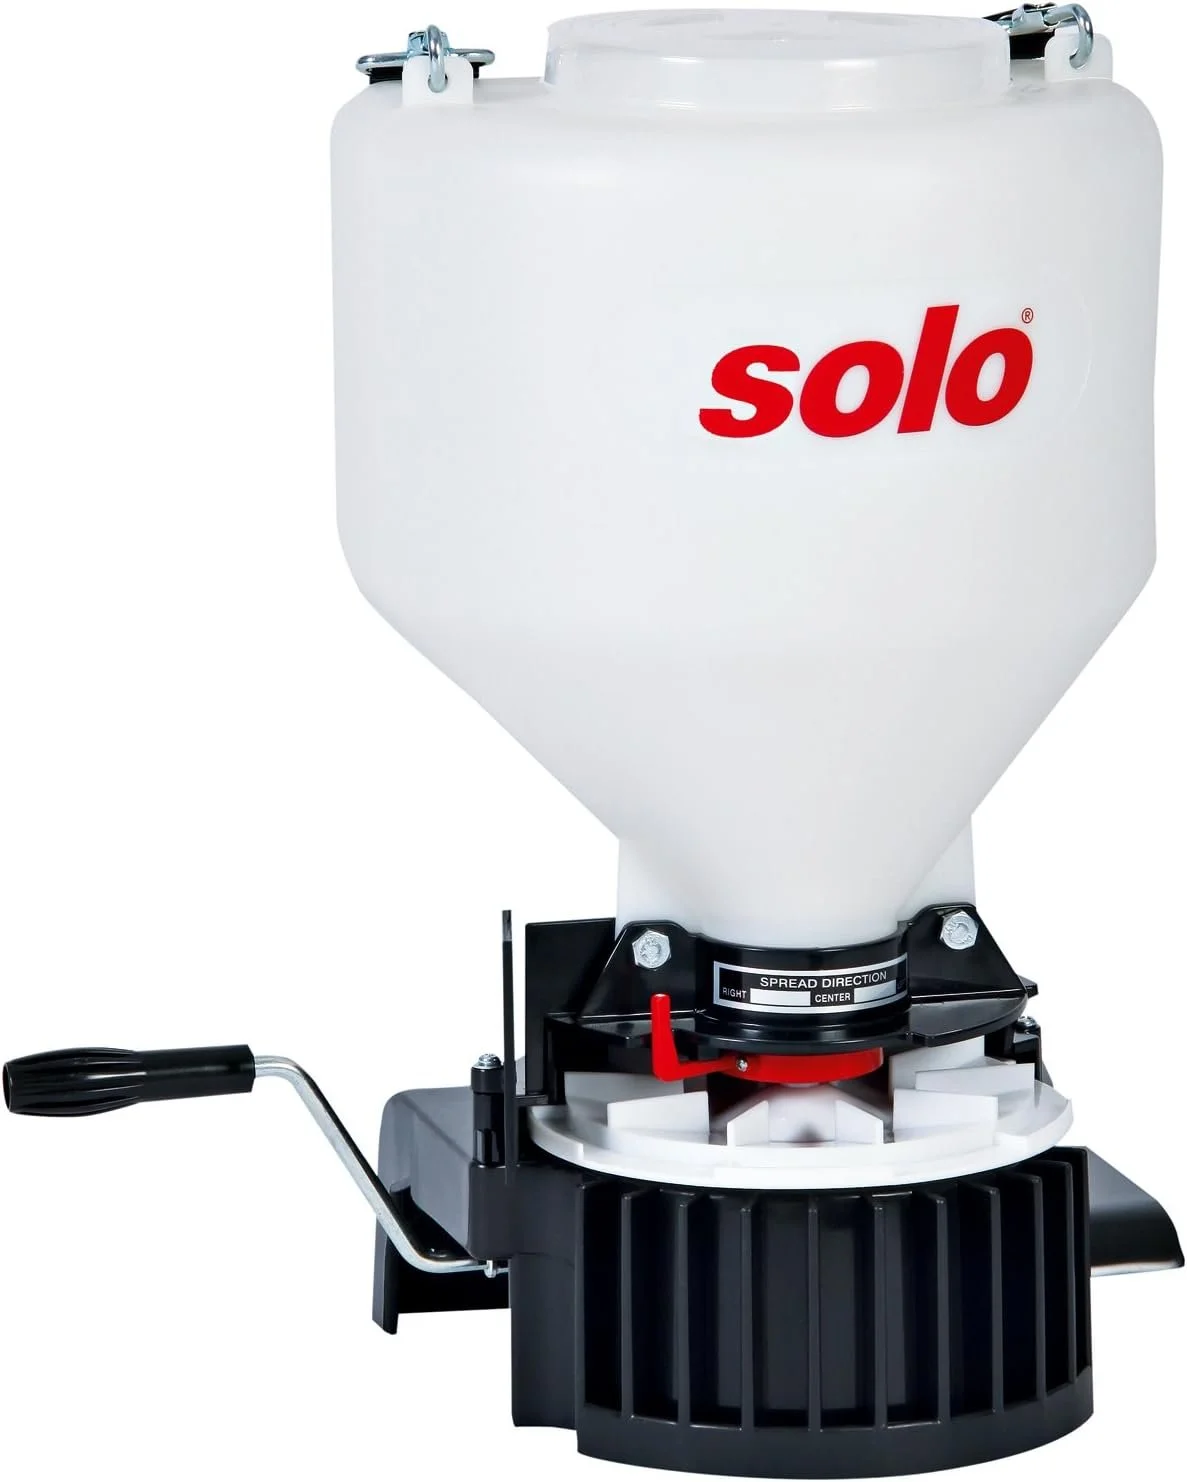
This chest-mounted spreader offers excellent control and precision, especially around flower beds, mulch lines, walkways, and other areas where you don't want fertilizer overspray. The adjustable spread rate allows for highly accurate application.
Important Note:
Because this spreader is supported by your shoulders and chest, it can place strain on the neck and upper back during extended use. It’s not ideal for large lawns, but for tight spaces or detail-oriented work, it performs exceptionally well.
Best For:
Homeowners who want excellent precision in areas where a push spreader risks throwing product where it shouldn’t go.
👉 View on Amazon:
Solo 421 20-Pound Chest-Mount Spreader
🟦 High-End Option (Professional Grade)
Lesco High-Capacity Fertilizer Spreader with Manual Deflector
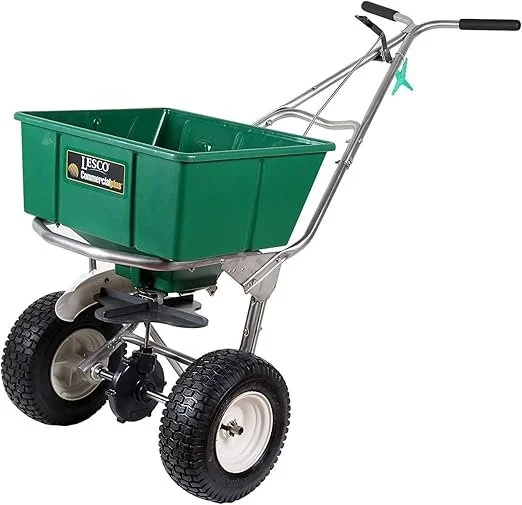
A commercial-quality spreader built for turf professionals who need consistent, accurate coverage year after year. Its heavy-duty construction, large hopper capacity, and smooth spread pattern make it one of the most reliable spreaders available.
What sets it apart:
The built-in side deflector allows you to control the spread pattern along driveways, sidewalks, flower beds, and property edges. This feature makes it easy to avoid spreading fertilizer into areas where it’s unwanted — a key advantage for achieving clean, professional results.
Best For:
Serious lawn enthusiasts, larger properties, and anyone who wants top-tier performance with precise edge control.
👉 View on Amazon:
Lesco High-Capacity Fertilizer Spreader with Manual Deflector
🌾 How to Apply Fertilizer Correctly (Step-by-Step)
Fill your spreader on pavement
Walk at a consistent pace (≈3 mph)
Overlap correctly (half pattern overlap)
Make perimeter passes first
Apply in straight, even lines
Sweep fertilizer off hard surfaces immediately
Affiliate Disclosure:
Cool Season Turf participates in affiliate programs. Some links on this site may earn a commission at no additional cost to you.
🔧 Spread Pattern Calibration (Quick Test)
Use a tarp to observe the heavy, medium, and light zones.
Your effective spread width is the medium-density area, not the full arc.
🌱 Final Thoughts
Choosing the right spreader — and using it properly — sets the foundation for a greener, more even, professional-looking lawn. This isn’t just a tool choice; it’s the method that determines how your turf will respond all season.
If you want to understand fertilizer types, N-P-K ratios, and how to choose the right product for each season, check out our Fertilizer Selection Guide (coming soon).
Want a customized fertilizer schedule built for your lawn?
Explore our Plans & Pricing page to get a personalized program.